How to Level A Yard for Pavers
This post contains affiliate links. This means I will make a commission at no extra cost to you should you click through and make a purchase. Read the full disclosure here.Welcome to our comprehensive guide on how to level a yard for pavers. If you’re planning to install a beautiful patio, walkway, or driveway with pavers, ensuring a level surface is essential. A level yard not only enhances the aesthetic appeal but also provides a stable foundation that prevents future issues such as uneven settling or drainage problems. In this article, we will take you through a step-by-step process of leveling your yard for pavers, enabling you to achieve a professional and long-lasting result.
Understanding the Importance of Leveling a Yard for Pavers
Before diving into the practical steps, let’s understand why leveling your yard is crucial when working with pavers. A level surface allows for proper water drainage, reducing the risk of water pooling or seeping into your foundation. Additionally, it ensures that your pavers remain stable and don’t shift over time, preserving the overall integrity and appearance of your paved area.
Assessing the Yard’s Current Condition
To begin, it’s important to assess the current condition of your yard. This step will help you identify any existing challenges or adjustments needed to achieve a level surface.
Analyzing the Slope
Start by examining the slope of your yard. Ideally, you want a slight slope away from your home or any other structures to facilitate proper water runoff. Use a level or a laser level to measure the slope accurately. If you notice significant slopes or uneven areas, you may need to adjust the grading before proceeding.
Identifying Existing Obstacles
Take note of any existing obstacles, such as tree roots, large rocks, or utility lines that might hinder the leveling process. These obstructions should be addressed before moving forward. Consult with professionals if necessary, especially when dealing with utility lines.
Gathering the Necessary Tools and Materials
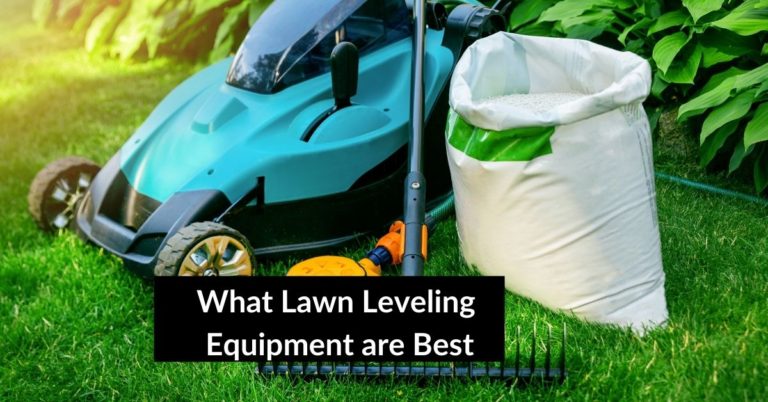
To level your yard effectively, gather the following tools and materials:
- Shovel or excavator
- Wheelbarrow
- Rake
- Level
- Plate compactor
- Base material (gravel, crushed stone, or sand)
- Edge restraints
- Pavers
- Jointing sand
- Landscaping fabric (optional)
- Landscape adhesive (optional)
Having these tools and materials ready will streamline the leveling process and ensure you have everything needed to complete the project successfully.
Clearing the Yard
Before leveling the yard, clear it of any vegetation, debris, or objects that might interfere with the excavation and compaction process.
Removing Vegetation and Debris
Start by mowing the grass as short as possible. Then, using a shovel or an excavator, remove any existing vegetation, including grass, weeds, or plants. Ensure that the area is clean and free from debris to achieve a smooth and level surface.
Addressing Drainage Issues
While clearing the yard, pay attention to any areas with poor drainage. If there are low spots where water tends to accumulate, consider incorporating a drainage system to redirect water away from the paved area. Proper drainage is essential for maintaining the longevity of your paver installation.
Marking the Desired Level
Next, mark the desired level of your yard. Use stakes and string to outline the area and establish the necessary grade for proper water drainage. Take measurements from the stakes to ensure a consistent level throughout the project.
Excavating the Yard
Excavating the yard involves removing the existing soil to create a space for the base material and pavers. Follow these steps to achieve the desired depth and consistency.
Digging the Foundation
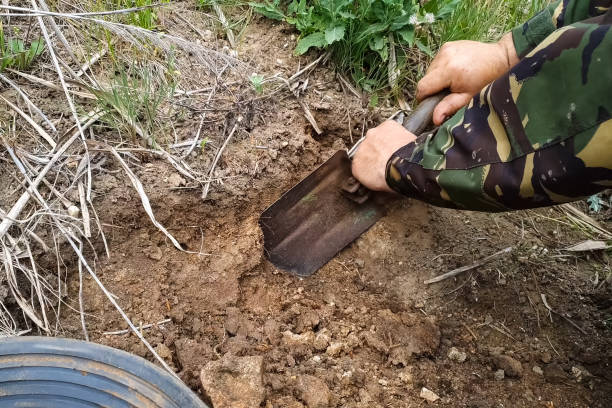
Using a shovel or an excavator, dig down to the desired depth for your paver installation. The depth will depend on the type of pavers, the base material, and any additional requirements for your specific project. Generally, aim for a depth of around 6 to 8 inches to accommodate the base material and the pavers.
Maintaining a Consistent Depth
While excavating, ensure that the depth remains consistent across the entire area. Use a level or a measuring tape to verify the depth regularly. This step is crucial for achieving a level surface.
Compacting the Soil
After excavating the yard, it’s essential to compact the soil to create a stable foundation. Proper compaction prevents future settling, unevenness, or sinking of the pavers.
Using a Plate Compactor
A plate compactor is a valuable tool for achieving adequate soil compaction. Start by compacting the soil in the excavated area thoroughly. Move the plate compactor in a back-and-forth motion, overlapping each pass to ensure even compaction.
Ensuring Even Compression
To ensure even compression, make multiple passes with the plate compactor over the entire area. Pay close attention to the edges and corners, as they tend to require extra compaction. Continue compacting until the soil feels firm and stable.
Adding a Base Material
The base material provides a solid foundation for your pavers, distributing the load evenly and preventing shifting or settling. Choose the appropriate base material based on your specific project requirements.
Choosing the Right Base Material
The base material can be gravel, crushed stone, or sand. Consider the type of pavers you’re using, the expected traffic, and the drainage needs when selecting the base material. Follow any specific recommendations from the paver manufacturer or consult with a professional for guidance.
Spreading and Compacting the Base
Spread a layer of the chosen base material over the compacted soil. Aim for a thickness of around 2 to 4 inches, depending on the specific requirements of your project. Use a rake to distribute the base material evenly, and then use a plate compactor to compact the base. Repeat this process until you achieve a stable and level base.
Installing Edge Restraints
Edge restraints are essential for maintaining the integrity and stability of your paver installation. They prevent the pavers from shifting or spreading outwards over time.
Securing the Paver Area
Install edge restraints along the perimeter of the paver area. These can be made of plastic, metal, or concrete, depending on your preference. Secure the edge restraints firmly into the ground, ensuring they are level and aligned with the desired layout.
Ensuring Proper Alignment
Check the alignment of the edge restraints using a level or a string line. Adjust as needed to ensure straight lines and even heights. Properly installed edge restraints will hold the pavers in place and provide a clean and finished look.
Laying the Pavers
With the base prepared and the edge restraints in place, it’s time to lay the pavers. Follow these steps for a successful installation.
Selecting the Paver Design
Choose the paver design that suits your aesthetic preferences and complements the surrounding landscape. There are various patterns and styles available, including herringbone, running bond, or basket weave. Take your time to plan the layout and ensure a visually pleasing result.
Placing and Aligning the Pavers
Start laying the pavers from one corner of the designated area. Place each paver carefully, ensuring they fit tightly together with minimal gaps. Use a rubber mallet or a wooden block to tap the pavers gently into place, aligning them with the edge restraints and the desired pattern.
Continue laying the pavers, working your way towards the opposite end. Periodically check the alignment and levelness using a straight edge or a level. Make adjustments as needed to maintain a consistent level surface.
Filling the Gaps
Once all the pavers are in place, it’s time to fill the gaps between them. Jointing sand is commonly used for this purpose.
Applying Jointing Sand
Spread jointing sand evenly over the entire paved area. Use a broom or a brush to push the sand into the gaps between the pavers. Ensure that the sand fills the joints completely and is compacted.
Compact and Seal the Pavers
After filling the gaps, compact the pavers once again using the plate compactor. This step helps to further stabilize the pavers and ensure a tight bond between them. If desired, you can also apply a sealer to enhance the color and protect the pavers from stains or weathering. Follow the manufacturer’s instructions for the specific sealer you choose.
Proper Maintenance
To ensure the longevity and beauty of your paved area, proper maintenance is essential. Follow these tips for ongoing care:
- Regularly clean the pavers by sweeping or using a leaf blower to remove debris.
- Address any signs of settling or shifting promptly by re-leveling and adding jointing sand as needed.
- Consider applying a fresh coat of sealer every few years to maintain the pavers’ appearance and durability.
Enhancing the Paver Area
To elevate the aesthetics of your paver installation, consider adding some additional features and elements.
Adding Borders and Landscaping
Install borders or edging materials along the perimeter of the paver area to create a clean and defined look. Additionally, incorporate landscaping elements such as plants, flowers, or shrubs to enhance the overall appeal of your yard.
Incorporating Lighting or Decorative Elements
To make your paver area more inviting and functional, consider adding outdoor lighting fixtures or decorative elements such as statues, water features, or seating areas. These additions can transform your yard into a welcoming and enjoyable space.
Conclusion
Leveling a yard for pavers is a rewarding project that can significantly enhance your outdoor living space. By following the step-by-step process outlined in this article, you can achieve a professional-looking result that will stand the test of time. Remember to consider the slope, gather the necessary tools and materials, clear the yard, excavate and compact the soil, install edge restraints, lay the pavers, fill the gaps, and maintain the area properly. With proper planning and execution, you’ll have a level and visually appealing paved area that you can enjoy for years to come.
FAQs
Can I level my yard myself, or should I hire a professional?
Leveling a yard for pavers can be done as a DIY project if you have the necessary tools, skills, and time. However, for complex or larger projects, or if you lack experience, it’s advisable to hire a professional for the best results.
How long does it take to level a yard for pavers?
The duration of the project depends on the size of the yard, the complexity of the terrain, and your level of expertise. It can take anywhere from a few days to several weeks to complete the leveling process and install the pavers.
What tools do I need to level a yard?
Some essential tools for leveling a yard include a shovel or an excavator, a wheelbarrow, a rake, a level, and a plate compactor. Additional tools may be required based on the specific requirements of your project.
Can I reuse the existing pavers after leveling the yard?
In most cases, it’s possible to reuse existing pavers after leveling the yard. However, it’s important to assess their condition and ensure they are still in good shape and compatible with the new base and layout.
What are some common mistakes to avoid when leveling a yard?
Some common mistakes to avoid include inadequate soil compaction, improper base material selection, insufficient edge restraints, and neglecting proper maintenance. Take your time, follow the guidelines, and seek professional advice if needed to avoid costly errors.

